Info Exchange is a lot like a FTP site, but better. In order to access the Info Exchange Server for a specific project you need to be on either the internal or external teams.
-
The internal team is composed of project team members from LMHT Associates. Internal project team members can send and receive file transfers and transmittals to and from their Info Exchange Server using Project Center.
-
The external team is composed of contacts from other companies that with LMHT Associates on projects. External project team members who have been provided with login credentials to LMHT Associates' Info Exchange server can send and receive file transfers and transmittals using their web browsers.
When a new project is first started, there are no internal or external project team members.
In the Task Panel in the upper left, choose the Add option.
You will have two options.
-
Add > Internal Team Members
Click to open the Add Internal Project Team Members dialog box to add a contact to the internal project team. You can filter the list to help make your selections. Place a check box next to the contact/s you would like to add.
-
Add > External Team Members
Click to open the Add External Project Team Members dialog box to add a contact to the external project team. You can filter the list to help make your selections. Place a check box next to the contact/s you would like to add. This will send the contact an email letting them know that they have been assigned as part of the project team and gives them access to the Info Exchange Server through a login and password.
If you need a new contact that is not listed. You can add a new contact by selecting the ADD NEW... button. Fill in as much info as you can. The new contact is added to the global contacts database for everyone to access.
Back on the Project Home page for any project. Click on the Info Exchange link. (see below)

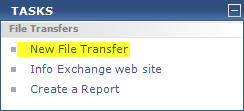
In the Task Panel in the upper left, choose the New File Transfer.

In the next dialog choose Yes, fill out and record Project Transmittal. This will save a record of what was sent and to whom and when it was downloaded.
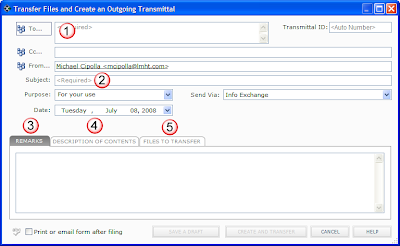
Next, you will see the Transmittal Form below. (see image below)
Fill out like an email message.

- To... Just like email here. Select from the team members that you set up already.
- Put in a subject from what you are sending. It's helpful to include the project number/name here.
- Remark Tab
- You can write a short email here.
- Description of Contents Tab
- This is a list of what files are being sent. Tip: Access this area after you have selected the files that you want to transfer. It will fill in automatically with what you choose in the Files To Transfer Tab when you select the Populate from File to Transfer button.
- Files To Transfer Tab
- Click the Add Files or Add Folder to select the data that you wish to send.
- If you are sending AutoCAD files there is on need to select all the xrefs. You can just select the sheet files you want to send. Info Exchange will then grab the needed xref files automatically. Nice feature!

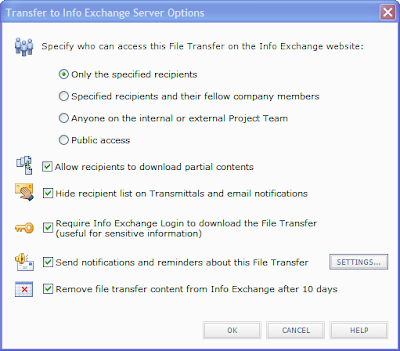
Click OK to finish.
Info Exchange will then post the data to the server for downloading.

You will be sent an email when the the data is downloaded. You can also track the data from within the Info Exchange Center.


